
Are you in the mood to try something new in your hair by doing it on your own? Just like when we look in the mirror, we always think of trying new things to make us look presentable and attractive, and we always tell ourselves…
I want to be simply gorgeous.
Now is the best time to try the new trend in town!
There are lots to consider if you plan to dye your hair at home. Aside from all the materials, it will also take time to choose the right color that suits you and your hair – and the more vibrant color you choose, the more things there are to do. Whatever the color you choose for your hair, from black to brown, green or purple, or even copper hair, we provide a step-by-step guideline for you to follow to achieve your desired hair.
What You’ll Need for Bleaching and Dying Your Hair At Home?
To achieve your gorgeous hair, you must have the following materials to begin:
- Bleach;
- Developer;
- Brush for hair/toothbrush;
- Comb;
- Vaseline;
- Clips;
- Gloves;
- Clean towel;
- Foils/plastic clear wrap;
- Spray bottle with water;
- Hair dye (Color of your choice);
- Small mixing bowl;
- Conditioner.
How To Bleach Your Hair?
Conduct a strand test to protect your hairline and a patch test to rule out allergies or unpleasant reactions before you begin. Before using the product on your hair, put on some gloves. Having your hair bleached at home is very risky. It will be more comfortable if you have someone who can help you.
Steps To Bleach Your Hair
Step 1: Your hair must be dry, and if any areas are damp, blow-dry them first. Brush out tangles and start sectioning your hair.
Step 2: Apply the vaseline to your skin where the bleach may come in contact with your skin by accident prevention is better than cure. Prepare all of your materials before you begin.
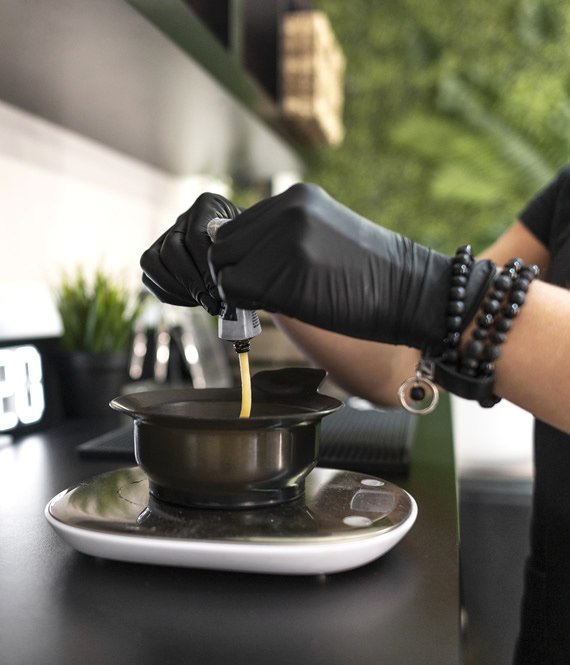
Step 3: Follow the direction on your lightener and developer materials. Not all brands are the same, but most bleach mix for a 2:1 ratio (meaning two parts developer, one part lightener). The measurement for this kind of hair dyeing needs to be exact. Add the product to your mixing bowl and combine them using the brush until smooth.
Step 4: Application time! Apply the bleach to one section of your hair at a time. Saturate your hair with the mixture. Work from the ends of your hair to within a few inches of the root. Since they usually process the bleach more quickly, these come last. To avoid a hot base, do not apply them near your scalp. And cover each section with foil or plastic clean wrap.
Step 5: Set a timer for at least 15 minutes and allow the bleach to sit on your hair. Spray some water from a spray bottle onto a portion of your hair to check the color. The bleach should not leave on your hair for longer than 45 minutes. Your scalp or hair may suffer harm as a result.
Step 6: Rinse the bleach from your hair with water, and rinse it well. Tip your head back and flip to avoid getting any product in your eyes, do not use conditioner if you plan to tone your hair. If at all possible, wait for 24 to 48 hours before shampooing.
Step 7: Let your hair air dry after using a towel to dry it. Avoid blow drying it right after bleaching. It might damage your hair.
Proceed To The Color You Want
Choose the perfect shade you want. Don’t be tricked by the picture of the box. You must also perform a patch test to check for adverse reactions or allergies and do a strand test to protect your hairline. Wear gloves before applying the product to your hair.
Steps To Dye Your Hair
Step 1: In a plastic bowl or container, mix a ratio of 1:1 of the desired hair color cream dye and oxidizer/developer. Mix it well, and prepare the clean towel in the bathroom and the conditioner you will use after rinsing the product.
Step 2: Do a strand test before you proceed with coloring your entire hair. Pick a small section of hair at the back of the neck, apply the product and wait for it to see if your skin is irritated after putting on it. Don’t proceed to the next step if you notice that your skin is irritated.
Step 3: Section your hair and apply the color. Use clips while sectioning your hair to create four sections from ear to ear and down the back. You are now starting your DIY hair coloring home service. When coloring your hair, begin at the roots and work up to the ends. Finish it well, don’t rush, and be excited with the result. Just take your time while coloring the entire section.
Step 4: It’s optional to cover your hair with a plastic cap after dying it to prevent the color from getting on your skin and the surface of your hair. Observe and remember the time that is in the instruction.
Step 5: After waiting for a couple of minutes, you’ve already noticed that your hair is already dyed. Remove the plastic cap (if you cover your hair with it). Go to the bathroom and rinse it well, and then if you think that all the product is gone, lather a conditioner on your hair to avoid brittle and dryness. Massage it for about a minute to relax your scalp and rinse. Lastly, tap it with a clean and dry towel. If you have a blower, use it to dry it; if not, let it try to comb it.
Sometimes we want to achieve the dream color we like by doing it ourselves or what we call DIY. It is not about saving money or choosing the cheapest way. It is about building your self-esteem by achieving what you want. It’s your confidence and love for yourself that make you look stunning. Take good care of your hair because that’s your crown of glory.

Hi! I am author + writer on personal development, beauty, relationships and self-care, sharing insights through this blog since 2018. After years of practicing personal growth, emotional wellness and feminine lifestyle (plus 19 years in a thriving relationship), I share effective and tested advice to help you foster beauty, self-improvement and order in your life. Some articles are written by a small team of beautiful writers I trust.

Leave a Comment